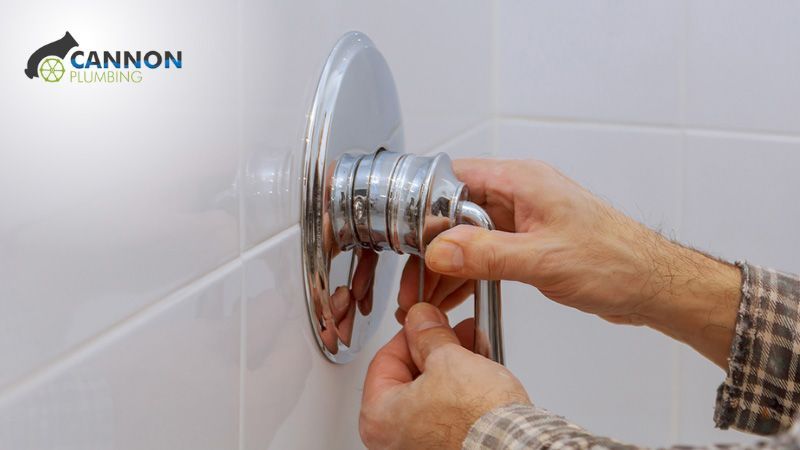
DIY Tips & Tricks For Shower Handle Replacement
A daily shower is an essential part of maintaining personal hygiene. It's where you forget about the day's troubles and tensions. When you step into your shower, the last thing you want to worry about is struggling with a stubborn shower handle. Especially if hot water is involved, it can be both frustrating and dangerous.
It's time to take matters into your hands if you're sick of that old, leaky shower handle! You'll feel like a pro after using DIY instructions for
shower handle replacement. We can help you with anything from selecting the best replacement handle to performing the installation.
Tools & Materials Needed
Any DIY project's success depends on the correct tools and supplies. Having the right tools and materials make the difference between a job well done and a disaster waiting to happen. Each tool and material has a specific purpose; having them on hand makes any DIY project easy and successful.
Tools Required
To perform a shower fix, you need tools such as a hammer, a screwdriver, pliers, a wrench, a level, a tape measure, and a utility knife. The screwdriver and pliers are excellent for manipulating and tightening screws while removing and replacing shower handles. The hammer is necessary for driving nails or disassembling handles if required. The level helps ensure that everything is straight and level, and the wrench is handy for turning nuts and bolts of handles. Both the utility knife and the tape measure are necessary for measuring distances and slicing through materials like rubber or plastic.
Materials Required
Materials like electrical tape, duct tape, nails, screws, nuts, bolts, washers, and safety glasses are needed for replacing shower handles. A variety of fasteners, including screws, nails, nuts, bolts, and washers, are required to install the new handle properly. Ensure the handle is securely attached and won't lose over time. It's crucial to choose the appropriate size and type of fastener.
Each tool and material has a specific purpose that makes any DIY project easier and more successful. So whether you're building a new piece or fixing a leaky faucet, make sure you have these tools and materials on hand to help you get the job done right.
Steps For Shower Handle Replacement
Process of Removing the Old Shower Handle
It is a relatively easy task to remove the old shower handle. However, this process involves,
- Turn off the water supply and place a rag or towel over the drain to prevent any small parts from falling in.
- Remove the screws of the old shower handle by using a screwdriver. Once the nut is removed, you should be able to pull the handle off gently.
Process of Installing the New Shower Handle
A new shower handle may be installed in just a few simple steps, making it an ideal weekend project for the skilled householder. Here is a general process for installing a new shower handle:
- Make sure the valve stem is in good shape before installation.
- The valve stem should be replaced if there is any damage.
- Install the adapter, if necessary, onto the valve stem before attaching the new handle.
- Secure the handle to the valve stem using the screws included with the new handle.
- Turn on the water supply to check that the new handle is operating properly.
- After inspecting the proper functioning of your shower handle, turn off the water supply again.
- Cover the screws with the plate that comes along with the new shower handle.
Common Issues Arise During the Replacement Process & How to Fix Them
Many problems can occur when installing or replacing a shower handle. Some of them include the following:
- Stripped screws are a common problem that occurs during the replacement process. Trying to unscrew a stripped screw is one of the greatest frustrations, but there are ways to overcome this problem.You can try loosening the screw by holding the head with pliers or a screw extractor and rotate it in the opposite direction (anticlockwise). You can also use a screw extractor after drilling a tiny hole through the screw's core.
- The stuck valve stem is another possible problem. This can occur if the valve stem has been in place for a long time, causing it to rust or corrode. Turning the stem of a stuck valve back and forth with a wrench to free it. Apply heat to the valve stem by using a hairdryer or heat gun that expands the metal, making it easier to move if nothing else works. If you apply too much power, you risk breaking the valve stem, which will lead to even more issues.
- Incompatible components are also a major source of trouble. This can occur if you buy a handle instead of a shower valve that is not compatible with it. You can avoid this problem by only buying a shower handle that is made for your particular valve model. In that case, you may have to return the handle and get a different, compatible one.
- After replacing your shower handle, if water still leaks, check the connections and the valve stem. Make sure the O-ring or washer is in place and that all connections are secure. It's possible that the valve stem is broken and has to be replaced if the problem persists. Don't let leaks go unchecked because they eventually lead to costly repairs and high water bills.
Safety Precautions
Explanation of Potential Hazards & Safety Measures to Follow
There are a number of potential dangers while switching out a shower handle, including electrical shocks, falls, and cuts. These basic precautions are used to avoid accidents and injuries :
- The danger of electrical shock is one of the most serious threats while changing shower handles. As electricity and water do not get along, you should cut off the main power supply to the shower before you get started.
- Taking extra care to avoid slips and falls is essential when working in a damp and slick environment. Use a non-slip mat or towel to prevent falls, and wear shoes or boots with adequate traction. Never stand on the edge of the tub without first securing yourself with a sturdy step stool or ladder.
- Changing a shower handle can lead to cuts and other injuries. Use protective gloves whenever handling tools or parts to keep your hands safe from harm. If you get hurt, you should consult a doctor right away.
Maintenance Tips for Shower Handle
When it comes to bathroom maintenance, a plumber shower repair service can be a real lifesaver. Follow these regular maintenance procedures to maintain your shower handle for long-lasting results:
- Clean your shower handle regularly.
- Check for leaks.
- Lubricate the handle.
- Tighten loose screws.
- Replace worn-out parts.
- Check the water pressure.
Your shower handle can give you years of reliable service if you take the time to keep it in good working order. Whether you want to fix shower handle or install a new one, maintenance is equally important to have an exceptional bathing experience.
Conclusion
In conclusion, you can use appropriate equipment and materials to replace your shower handles in a few stages. You can keep your shower handle in pristine shape and save money on repairs or replacements by following simple DIY techniques and suggestions. Remember to prioritize safety and seek professional help if you encounter any shower handle issues you cannot fix yourself.
When it comes to shower handle replacement service, the experts at Cannon Plumbing always ensure your safety. Our plumbers are not only equipped with modern tools but also skilled and experienced to perform any task related to your shower fixtures. We have teams of professionals to ensure your plumbing satisfaction and peace of mind. For more information,
Contact Us Today!